Graphical User Interfaces with JavaFX Ⅰ
Objectives
- Create interactive application with graphical user interfaces (GUI) using JavaFX.
- Use common JavaFX user interface (UI) components and containers.
- Handle events generated by user interactions with the graphical interface.
Summary
Graphical User Interfaces (GUIs) provide visually engaging and interactive ways to develop software applications, making complex interactions intuitive and user-friendly. JavaFX emerges as a robust framework for creating sophisticated desktop applications with rich, dynamic interfaces.
At the core of JavaFX, several key elements work together to build compelling graphical applications:
-
Stage: The primary window of a JavaFX application, serving as the top-level container for all visual content. -
Scene: A container that holds all visual elements within your application. AStagecan host multipleScenes, enabling seamless navigation between different views and application states. -
Node: ANoderepresents any visual element that can be displayed within aScene. The root node forms the initial hierarchy and acts as the starting point for your application’s visual structure. -
Components: These are the fundamental building blocks of your graphical interface, also known as controls. JavaFX offers a wide range of components including buttons, labels, text fields, checkboxes, menus, and many more, allowing developers to create complex and interactive interfaces.
-
Layout Containers: These specialized containers help organize and manage the positioning of UI components within a parent Node. JavaFX provides several layout strategies:
VBox: Vertical stacking of componentsHBox: Horizontal arrangement of componentsGridPane: Grid-based layout with rows and columnsStackPane: Overlapping componentsBorderPane: Flexible layout with top, bottom, left, right, and center regions
-
Event Handling: A crucial mechanism that enables your application to respond dynamically to user interactions. Through event handling, you can define precise responses to actions like button clicks, mouse movements, and keyboard input, transforming static interfaces into interactive experiences.
By leveraging these components, developers can create powerful, responsive, and visually appealing applications using JavaFX’s comprehensive GUI development toolkit. Community documentation for JavaFX’s SceneGraph, UI Controls, Layout, Application Structure, and Best Practices is available at the JavaFX Documentation Project (opens in a new tab).
Follow the 2 Graphical Interfaces guide to set up and use JavaFX in your projects.
Exercise 1*
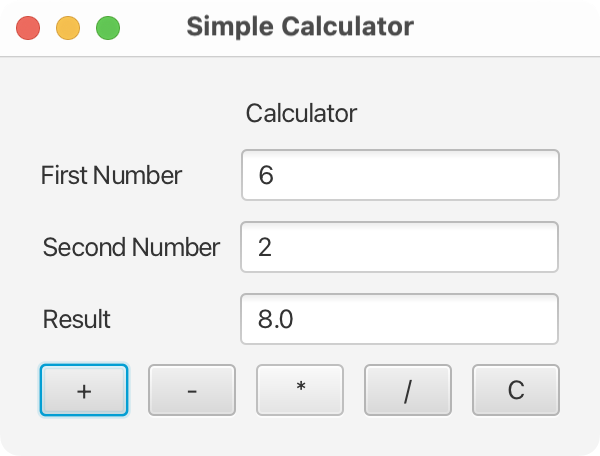
Create a new project, configure it to use JavaFX, and follow the steps below to design a simple calculator application that handles basic arithmetic operations:
- Choose the
BorderPaneas the root layout. - Resize the
Sceneto be300pixels in width and200pixels in height. - Set the window title (
Stage) to"Simple Calculator". - Add the needed UI components: labels, text fields, and buttons.
- Make sure that the result text field is not editable.
- Set the width of the created buttons to
50using thesetPrefWidth(double value)method. - Set the event handler for each button to perform the correct operation and display the result. The
Cbutton, when clicked, clears all the text fields. - Add some padding for a cleaner look.
Exercise 2
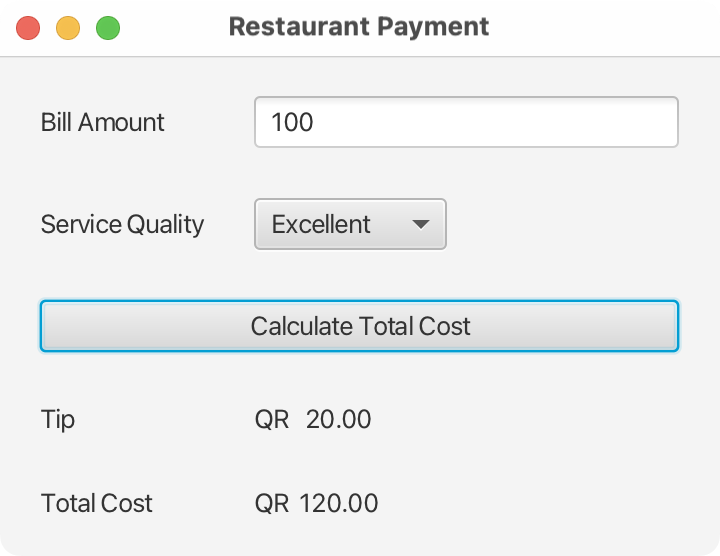
Create a new project, configure it to use JavaFX, and follow the steps below to design a simple restaurant payment application that takes tipping into account:
-
Choose the
GridPaneas the root layout. -
Resize the
Sceneto be360pixels in width and250pixels in height. -
Set the window title (
Stage) to"Restaurant Payment". -
We would like to add a tip based on three perceived levels of services. This is a good chance to use an enumeration. Create a new enumeration called
ServiceQualityfor this task using the following code:ServiceQuality.javapublic enum ServiceQuality { Excellent(.2), // 20% Good(.15), // 15% Poor(.1); // 10% private double tip; private ServiceQuality(double tip) { this.tip = tip; } public double getTip() { return tip; } } -
Add the needed UI components: labels, text fields, combobox, and buttons. You can create a combobox for the service quality label, using the following code:
RestaurantPayment.javaComboBox<ServiceQuality> serviceQualityCBox = new ComboBox<>(); serviceQualityCBox.getItems().addAll(ServiceQuality.values()); -
Make sure that the button spans all the columns when added to the
Scene. -
Add an event handler for the button to compute the total when clicked. Use the following code for the handler:
RestaurantPayment.javacalcBtn.setOnAction(new EventHandler<ActionEvent>() { public void handle(ActionEvent event) { double billAmount = Double.parseDouble(costTextField.getText()); ServiceQuality serviceQuality = serviceQualityCBox.getSelectionModel().getSelectedItem(); double tip = billAmount * serviceQuality.getTip(); root.addColumn(1, new Label(String.format("%7.2f", tip))); root.addColumn(1, new Label(String.format("%7.2f", billAmount + tip))); } }); -
Set both the vertical and horizontal gaps of the grid layout to
25pixels. -
Add some padding for a cleaner look.
Exercise 3+
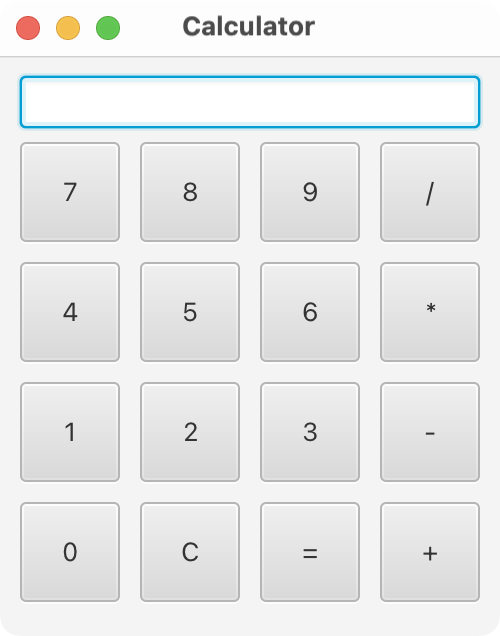
Update Exercise 1 to implement a full calculator layout with complete functionality.