Graphical User Interfaces with JavaFX Ⅱ
Objectives
- Bind UI components to model objects to allow the user to add, update, and delete objects listed in a
TableView. - Use common UI components including
Label,Button,ComboBox,DatePicker,RadioButton,ToggleGroup,TableView,TableColumn,ToolBar, andSeparator. - Use
PropertyValueFactoryandObservableListto bind data to components andDialogto create modal dialogs.
Summary
- Data binding allows synchronization between the user interface components and the underlying data model.
- Data binding ensures that changes in the data model are automatically reflected in the user interface.
- Reading and writing files are combined with a graphical user interface for a user-friendly interactive experience.
Exercise 1*
Country Explorer
- Create a
Countryclass based on the following diagram:
- Create a
CountryRepositorymodel class to hold the list of countries and implement a method to load all the countries fromdata/countries.csv(countries.csv).
The CSV file can be read line-by-line and each line split into its fields:
String line = scanner.nextLine();
String[] tokens = line.split(",");
countries.add(new Country(tokens[0], tokens[1], tokens[2], tokens[3]));-
Create a
CountryViewview to display all the countries along with their details using aTableView.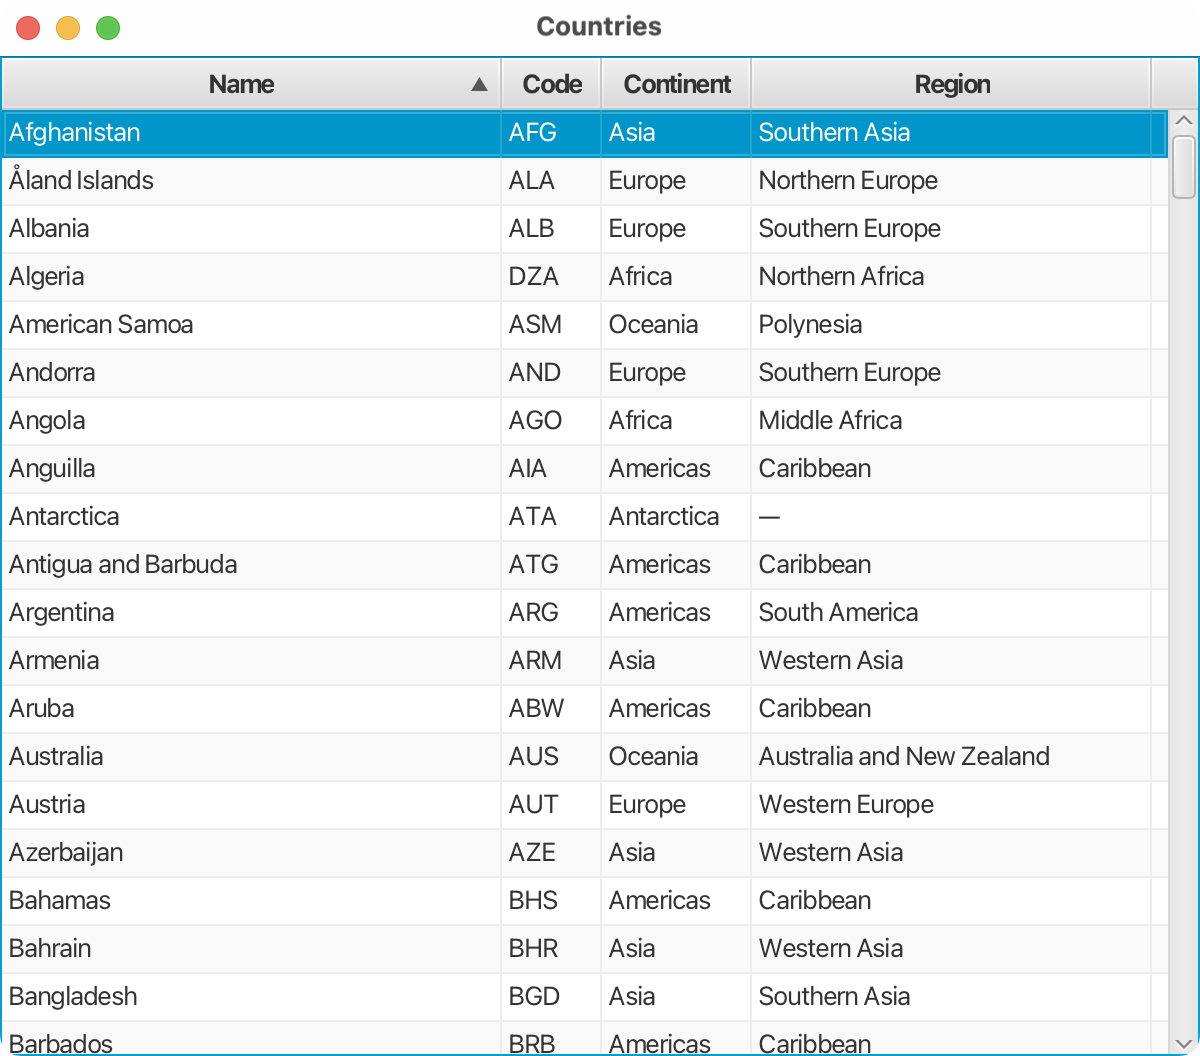
The
Namecolumn, for example, can be created and bound using:CountryView.javaTableView<Country> countryTable = new TableView<>(); TableColumn<Country, String> nameCol = new TableColumn<>("Name"); nameCol.setCellValueFactory(new PropertyValueFactory<Country, String>("name")); countryTable.getColumns().add(nameCol);The list of countries can be bound to the table view using:
countryTable.setItems(FXCollections.observableArrayList(CountryRepository.getCountries())); -
Update the view to be able to filter countries based on the currently selected continent and region. You need to add the required components and implement the corresponding event handlers. Use a
Toolbarto host the labels and dropdown lists.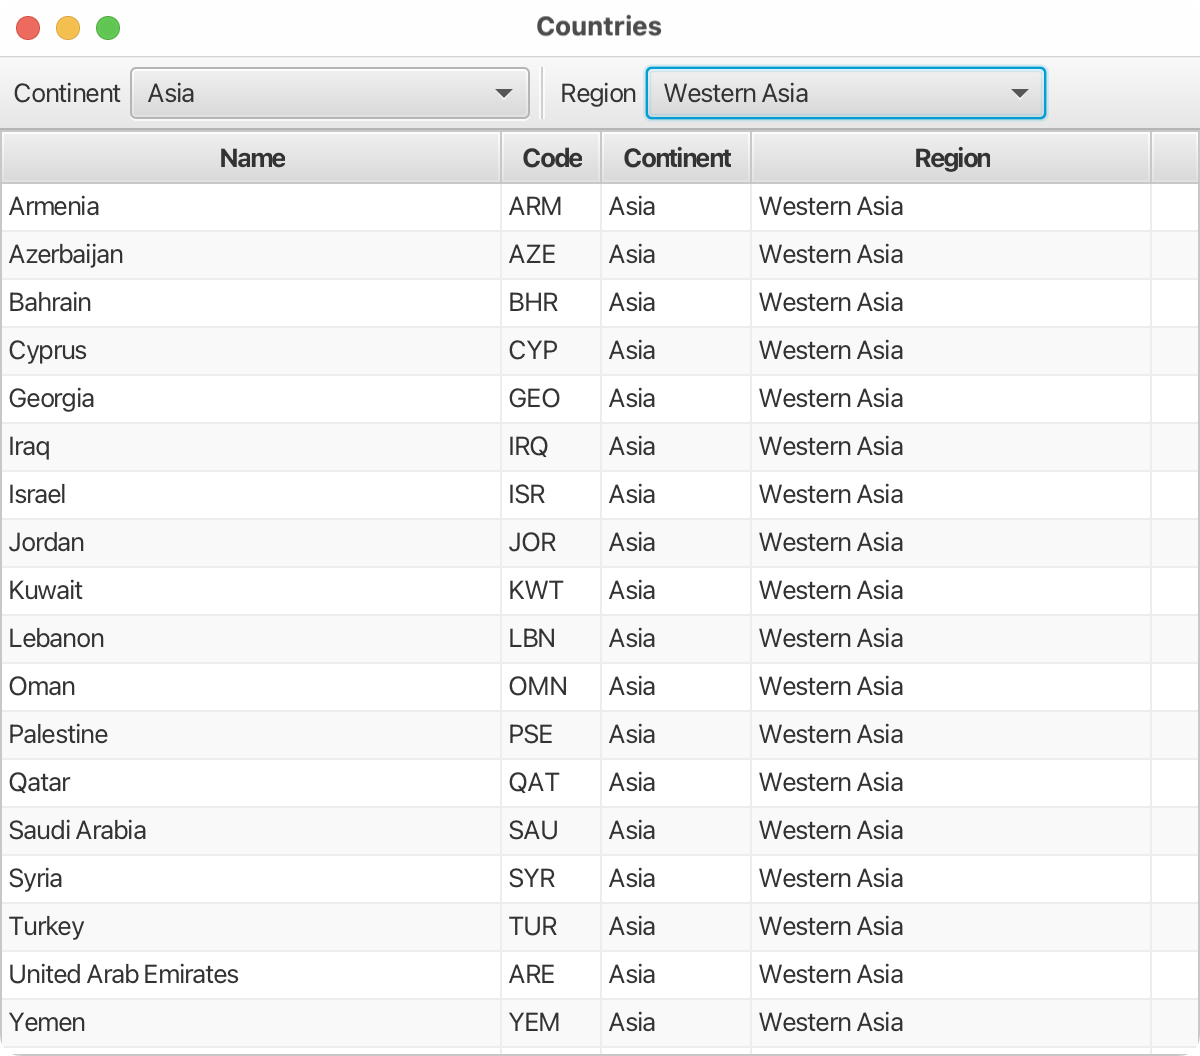
The list of continents can be bound to the dropdown list using:
continentComboBox.setItems(FXCollections.observableArrayList(CountryRepository.getContinents()));
Exercise 2
Trip Register
- Create a
Tripclass based on the following diagram:
- Create a
TripRepositorymodel class to hold the list of trips and implement methods to load/save all the trips from/todata/trips.csv(trips.csv).
-
Create a
TripViewview to display all the trips along with their details using aTableView.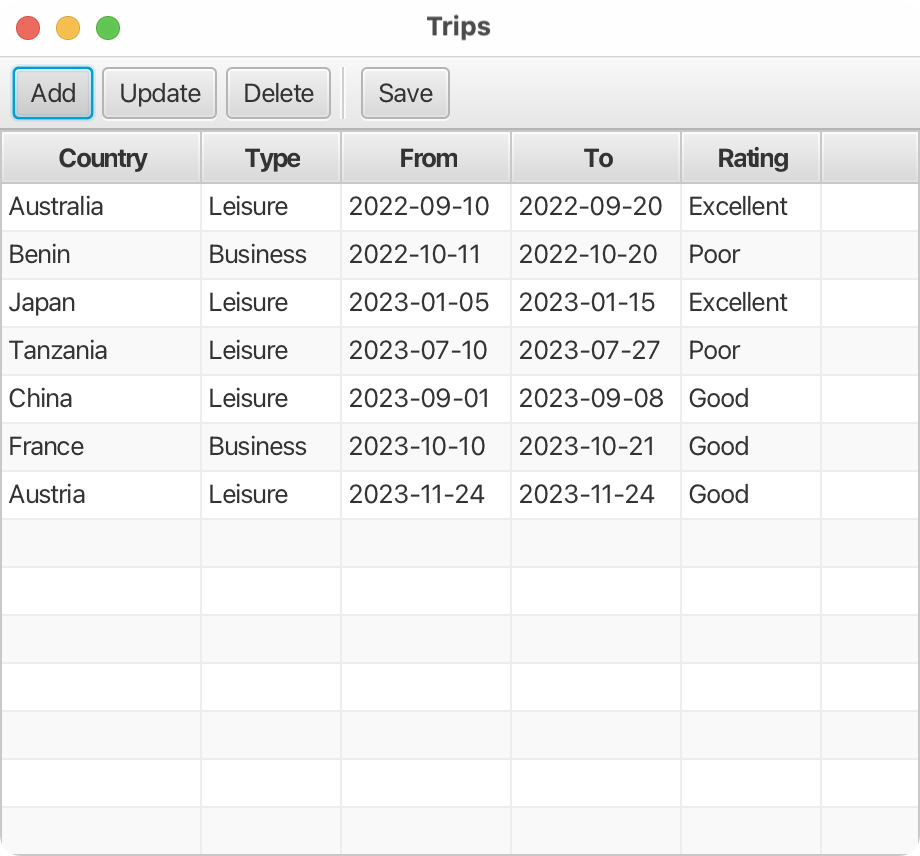
-
Add buttons to add, update, and delete a trip. Add a button to save all the trips as well.
-
Create a
TripEditorViewview to display and edit the details of a trip. This can be used to add a new trip or update a selected trip from the table.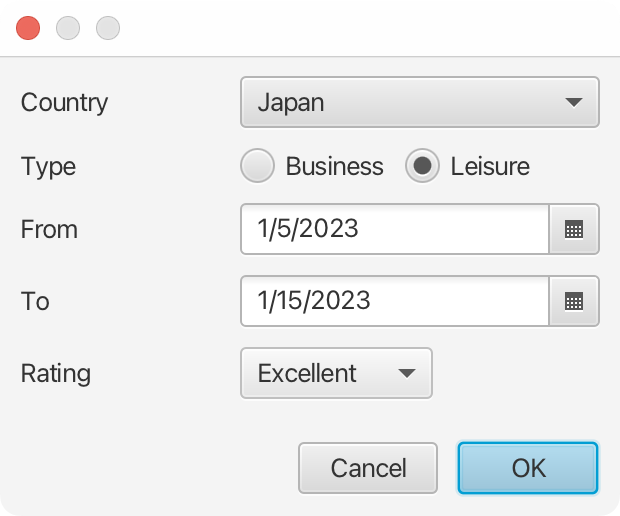
You can check whether an item is selected in the table or not using:
TripView.javaupdateButton.setOnAction(new EventHandler<ActionEvent>() { @Override public void handle(ActionEvent event) { int index = tripTable.getSelectionModel().getSelectedIndex(); if (index != -1) { ... } } } -
Create a
TripEditorDialogmodal dialog and use it to add new trips or update existing ones. A modal dialog can be created using:TripEditorDialog.javaDialog<ButtonType> dialog = new Dialog<>(); TripEditorView view = new TripEditorView(trip); dialog.getDialogPane().setContent(view.getRoot()); dialog.getDialogPane().getButtonTypes().addAll(ButtonType.CANCEL, ButtonType.OK); Optional<ButtonType> result = dialog.showAndWait(); ButtonType button = result.orElse(ButtonType.CANCEL); if (button == ButtonType.OK) { ... }